Classify Images with AutoML Vision
AutoML Vision is a cloud services from Google Cloud Platform. It helps those with limited Machine Learning expertise to train high quality image recognition models without writing any code. You upload images to AutoML via a web browser,train a model that will be immediately available for generating predictions via an easy to use REST API.
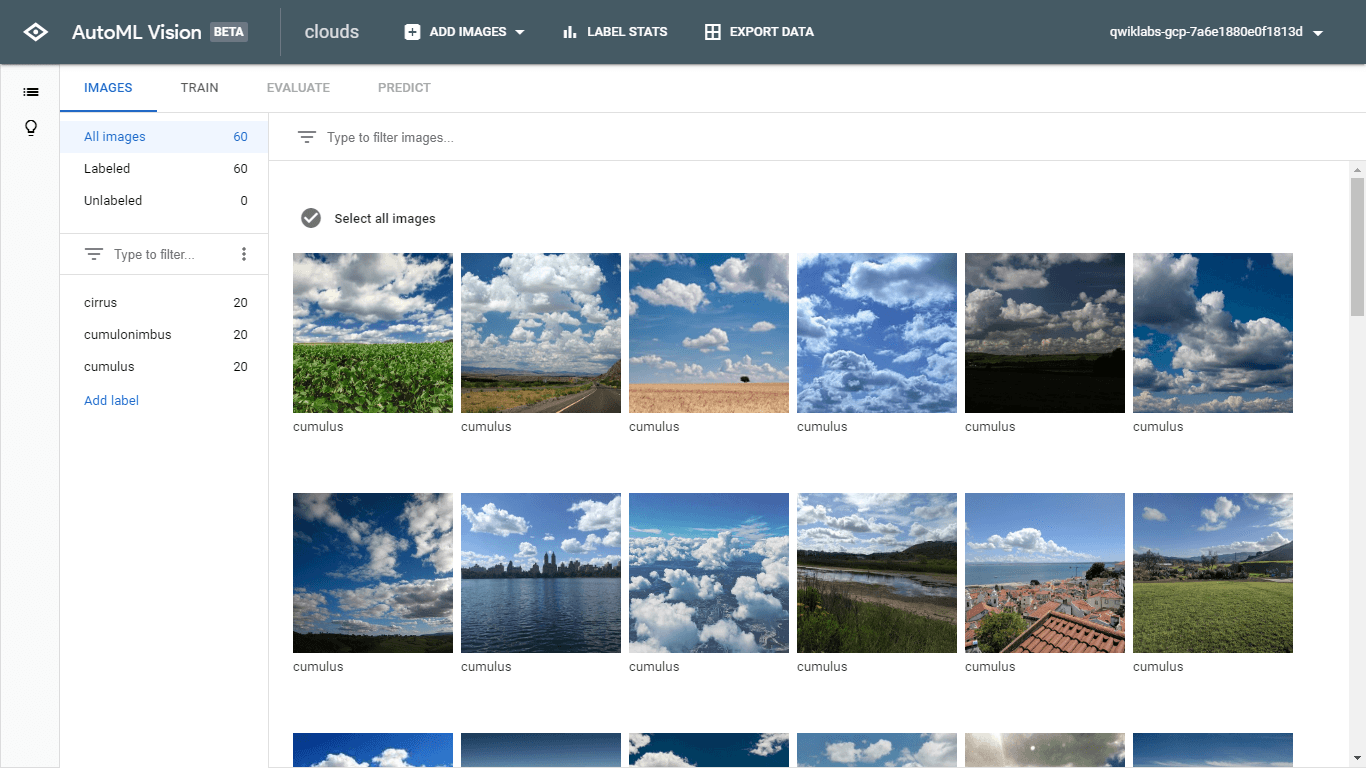
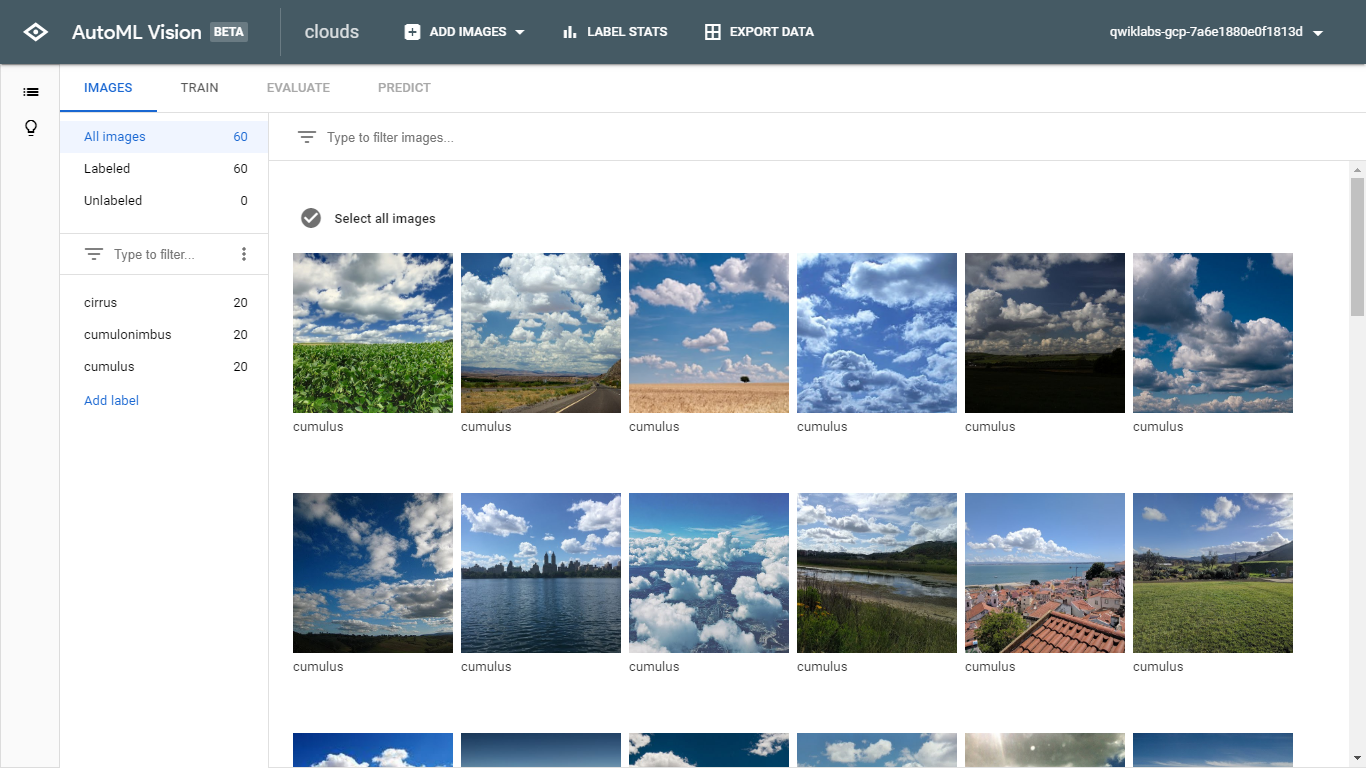
In this example, I uploaded images to GCP Cloud Storage and use AutoML to recognize different types of clouds (cumulus, cumulonimbus, etc.).
The Steps are:
Uploading a labeled dataset to Google Cloud Storage and connecting it to AutoML Vision with a CSV label file.
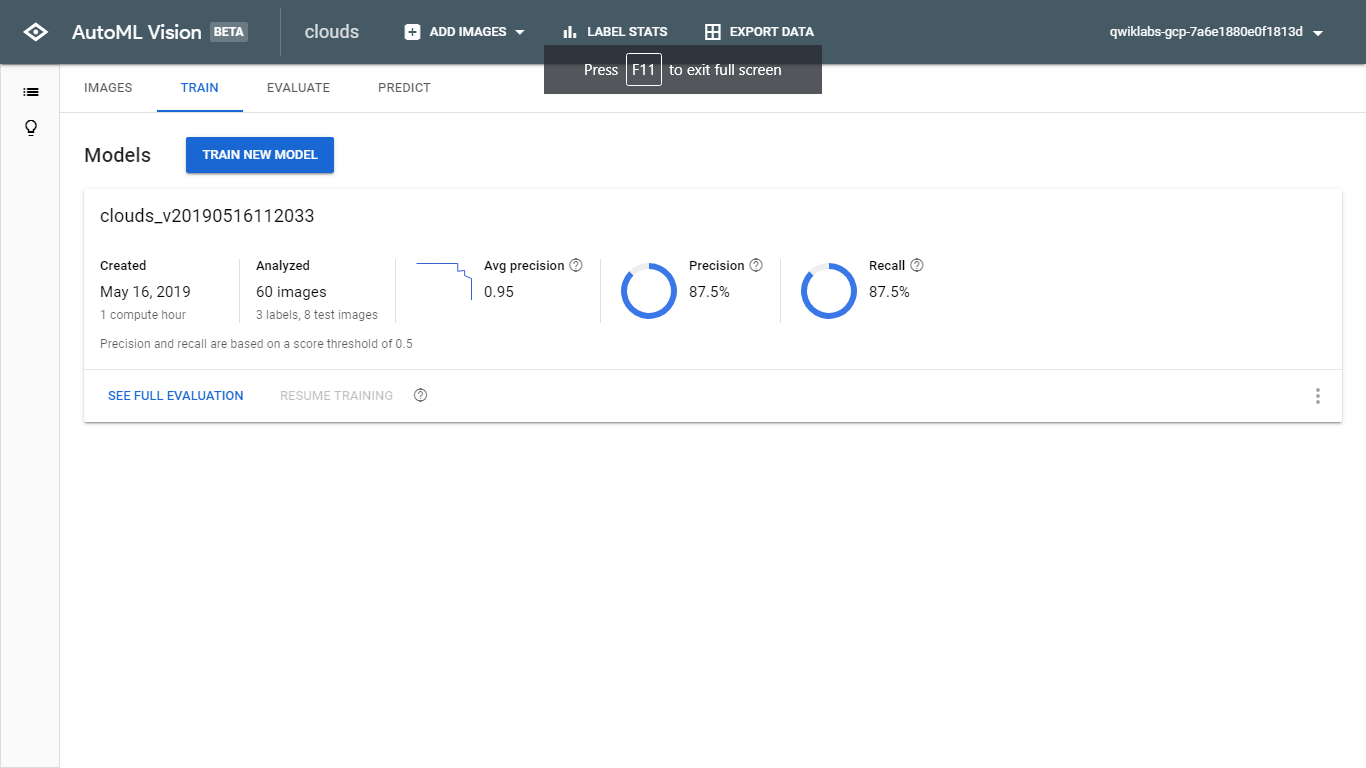
Training a model with AutoML Vision and evaluating its accuracy.
Generating predictions on your trained model.
The last 2 steps for ML practitioners like me are essential steps whether you do it on a Cloud platform like GCP or locally on your PC.
Set up AutoML Vision
AutoML Vision provides an interface for all the steps in training an image classification model and generating predictions on it. You start by enabling the Cloud AutoML API. Open the navigation menu and and select APIs & Services > Library. In the search bar type in "Cloud AutoML API". Click on the Cloud AutoML API result and then click Enable.
This may take a minute. You should now be on the following page (ensure that the activation status is set to Enabled):
NOTE: If you are working with a dataset that isn't already labeled, AutoML Vision provides an in-house human labeling service.
Train your model
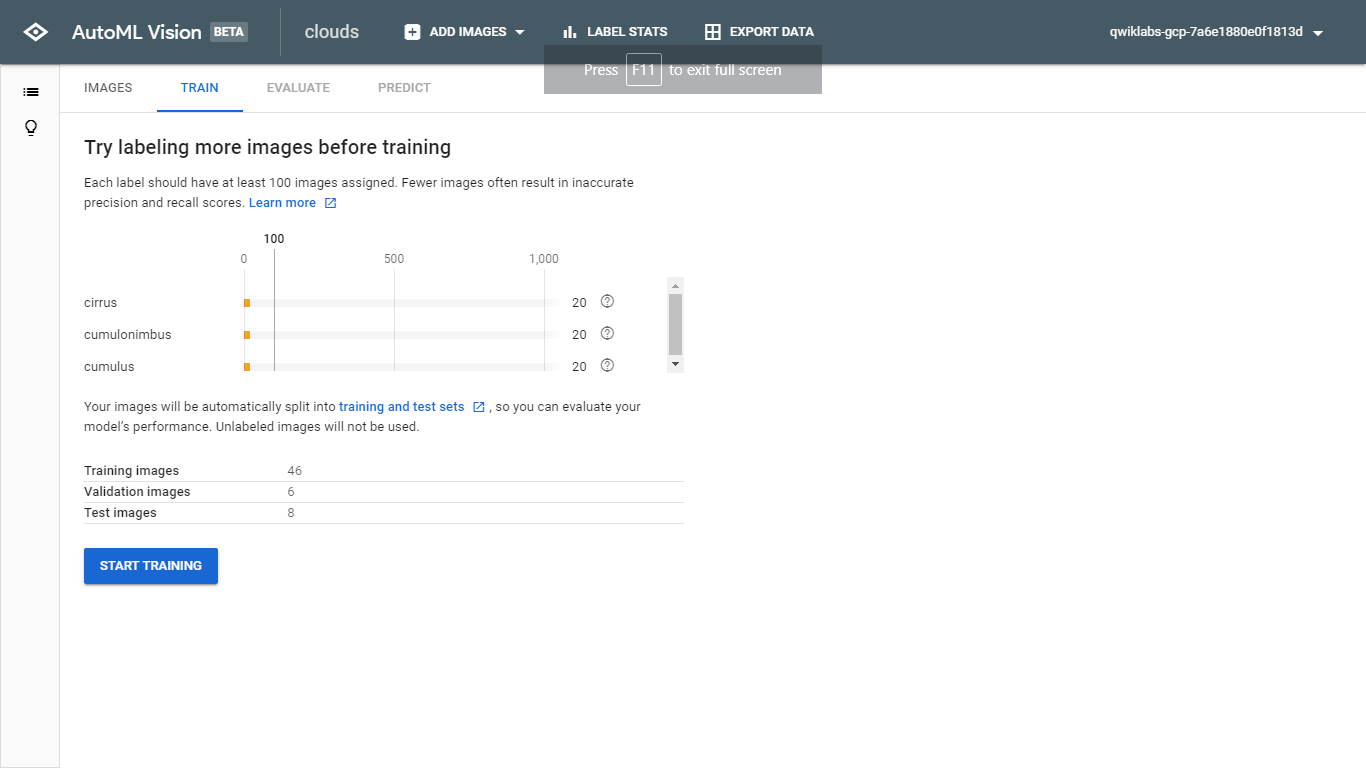
You're ready to start training your model! AutoML Vision handles this for you automatically, without requiring you to write any of the model code.
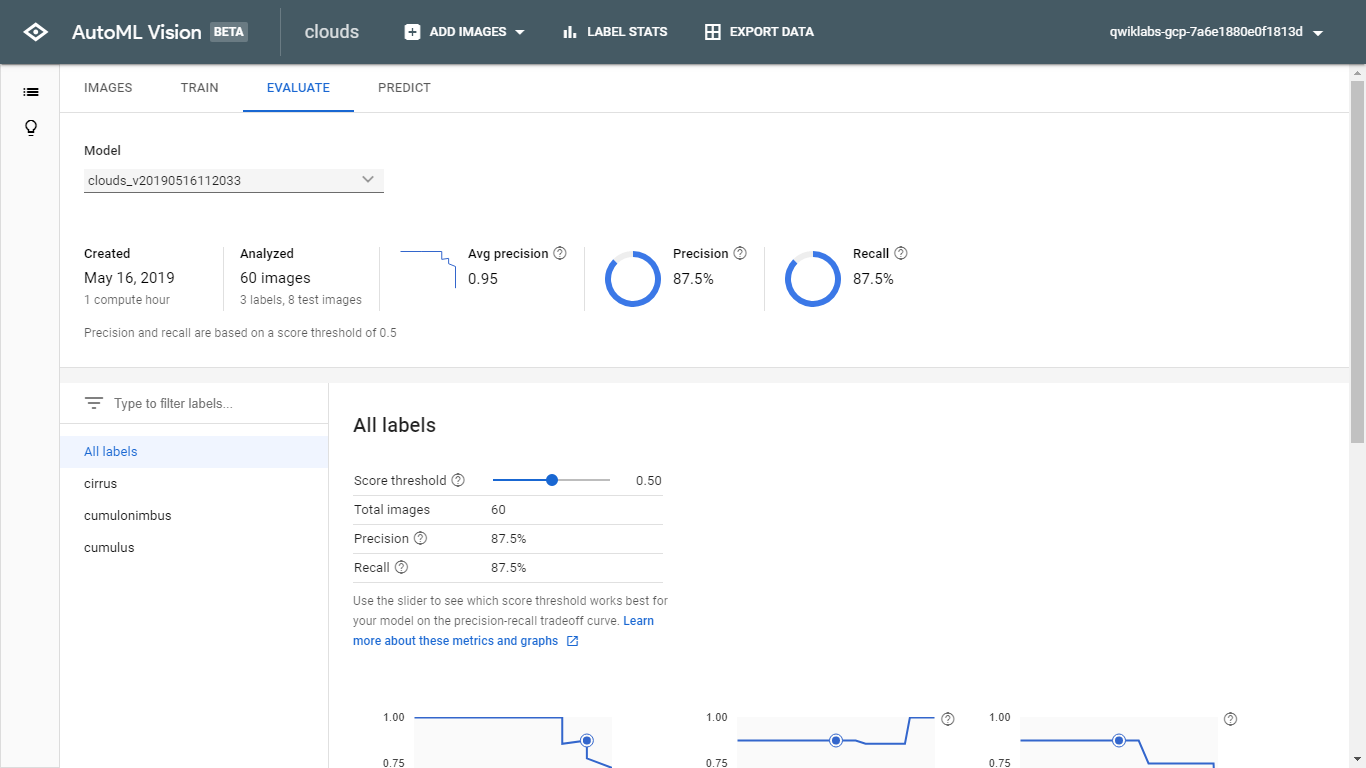
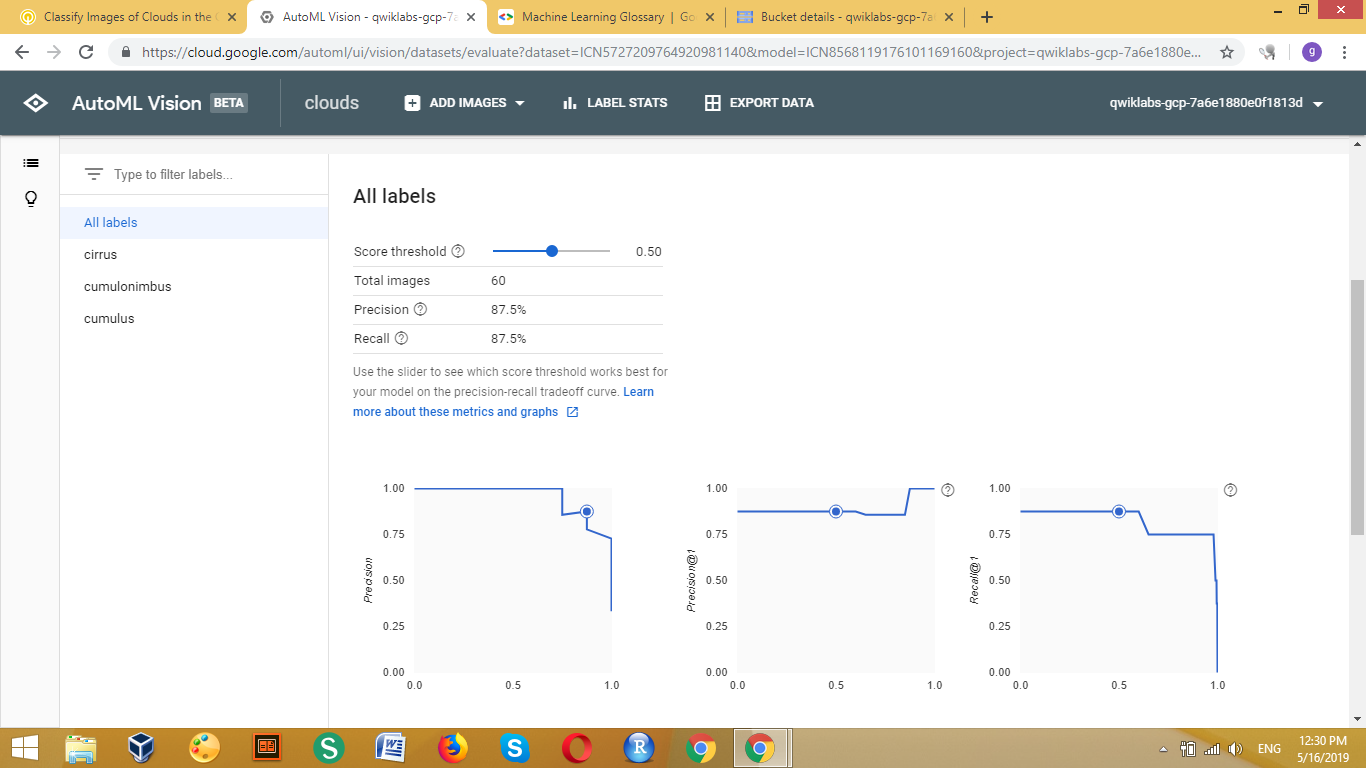
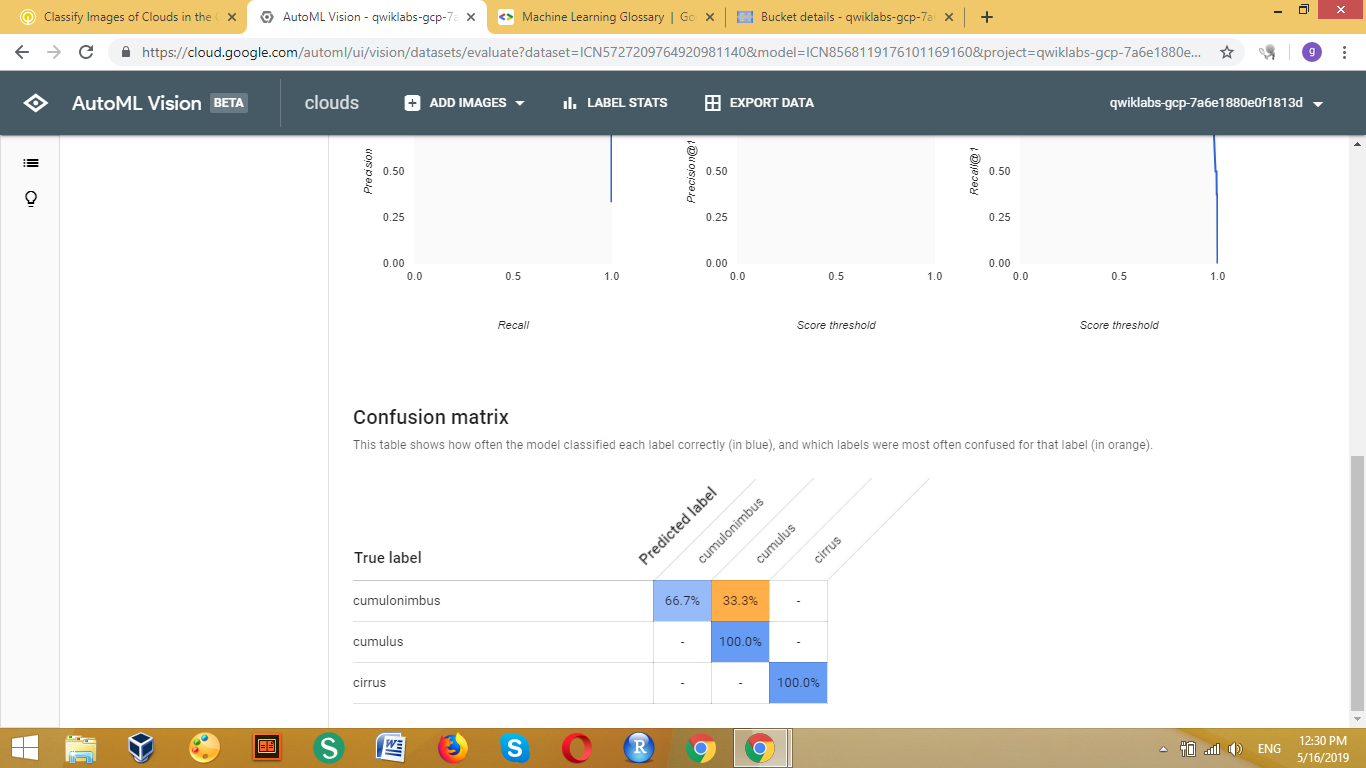
Evaluate your model
In the Evaluate tab, you'll see information about Precision and Recall of the model
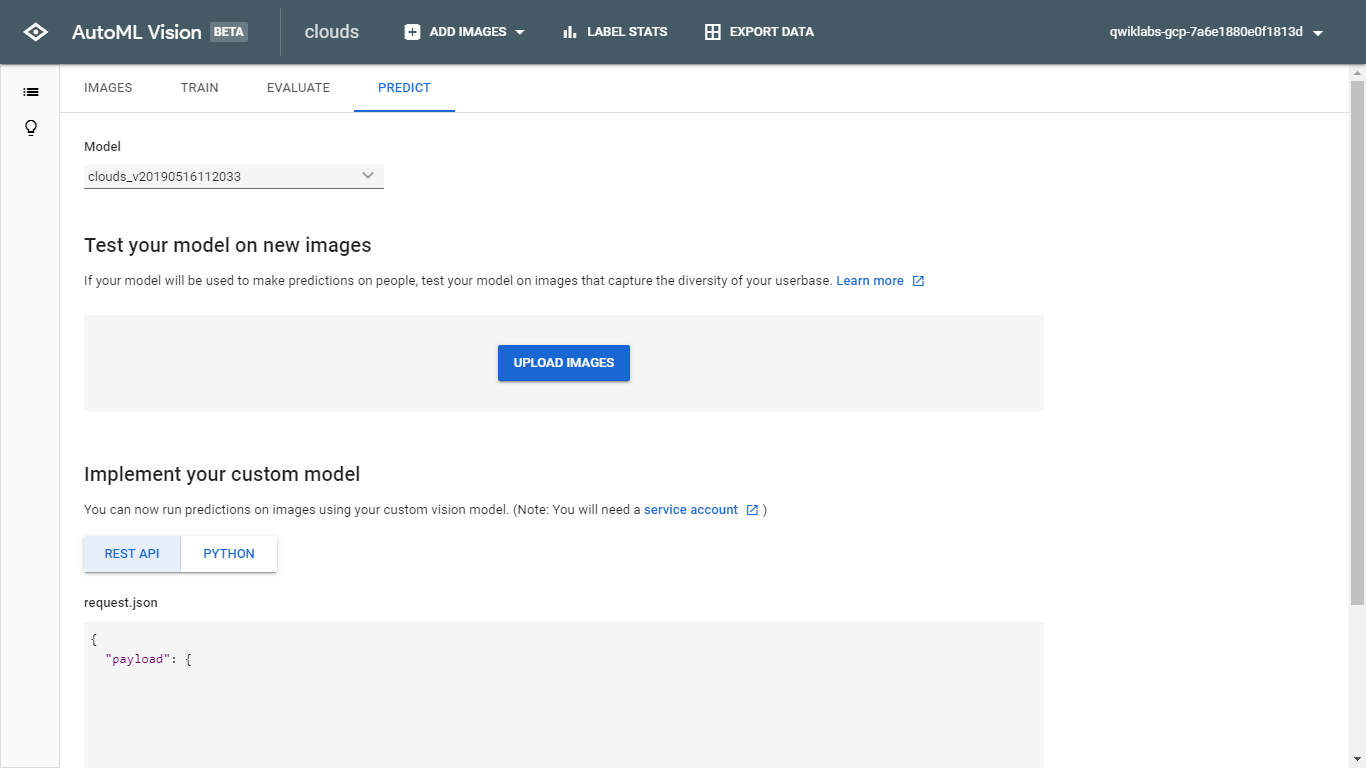
Generate predictions
Now it's time for the most important part: generating predictions on your trained model using data it hasn't seen before. Again this is not new for ML people like me.
Navigate to the Predict tab in the AutoML UI:
Cloud Shell
In addition to generating predictions in the AutoML UI, you can also use the REST API or the Python client to make prediction requests on your trained model. The sample Python code. You can try it out by copy/pasting these commands into Google Cloud Shell and providing an image URL.
predict.py
import sys

from google.cloud import automl_v1beta1
from google.cloud.automl_v1beta1.proto import service_pb2


def get_prediction(content, project_id, model_id):
  prediction_client = automl_v1beta1.PredictionServiceClient()

  name = 'projects/{}/locations/us-central1/models/{}'.format(project_id, model_id)
  payload = {'image': {'image_bytes': content }}
  params = {}
  request = prediction_client.predict(name, payload, params)
  return request  # waits till request is returned

if __name__ == '__main__':
  file_path = sys.argv[1]
  project_id = sys.argv[2]
  model_id = sys.argv[3]

  with open(file_path, 'rb') as ff:
    content = ff.read()

  print get_prediction(content, project_id,  model_id)
Execute the request
python predict.py YOUR_LOCAL_IMAGE_FILE yourgcpprojectid ICN8568119176101169160
Final Thoughts
This toy example is just a preview of what you can do with AutoML on GCP without writing a code.
Do not confuse AutoML Vision with AutoML Table. AutoML Tables introduce during Google Cloud 2019 are machine learning models on structured data (i.e. Tables and rows). It brings Linear Regression and Logistic Regression to Google Sheets.
Images like clouds or photos of customers using your products are consider unstructured data.